STEP TWO – Installing the WaDE Web Services
These instructions are for states that are using an Microsoft IIS webserver (Scroll down for Mac OSX instructions). You may already have an IIS webserver running, but step through the list below to ensure that all of the specified components are also installed on your IIS machine. Follow these steps to get IIS/PHP set up correctly:
Setting up Windows 7 IIS
- In Windows, access the Control Panel and click Add or Remove Programs.
- In the Add or Remove Programs window, click Turn Windows Feature On/Off.
- Select the Internet Information Services (IIS) check box.
- Within the IIS menu, turn on .NET Extensibility, CGI, ISAPI Extension and ISAPI Filters within the Application Development Features menu. Also turn on Dynamic Content Compression within the Performance Features menu. Click Okay.
- Right-click the My Computer icon on your server computer desktop, and then click Manage.
- In the Computer Management dialog box, open the Services and Applications node.
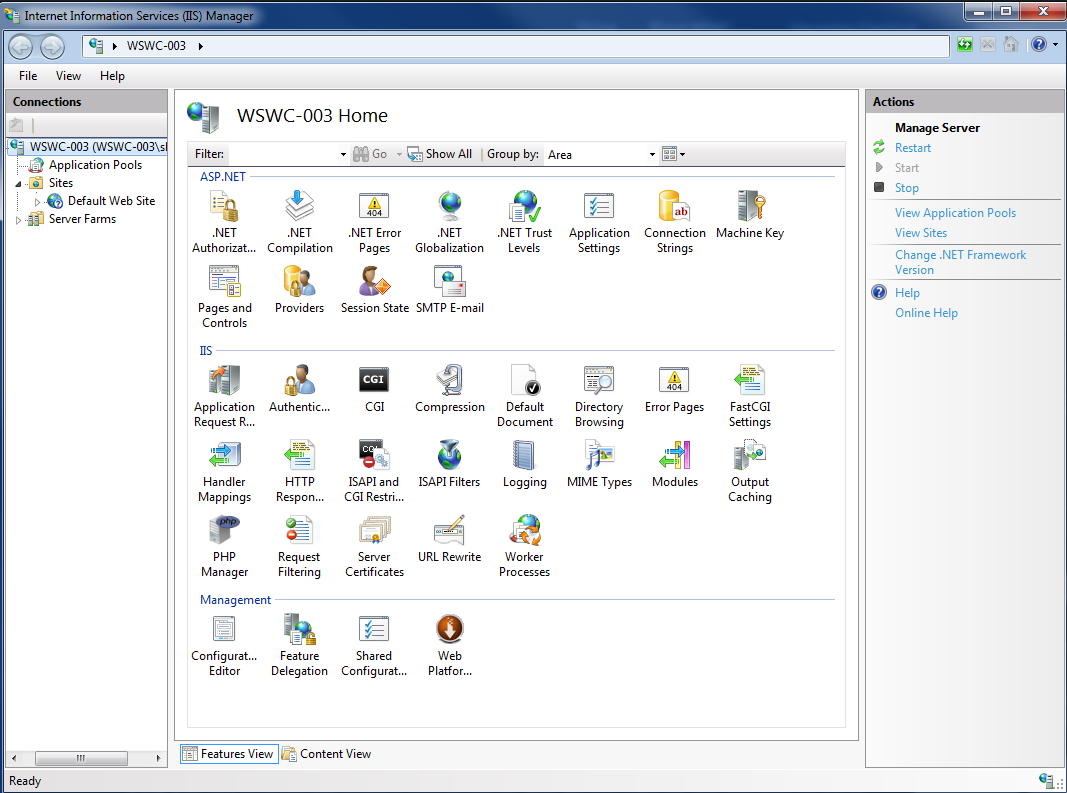
- Click Internet Information Services (IIS). In the new window to the right, find the Connections box and click on your local machine to open its contents. Click on Sites.
- Right-click the Default Web Site–>Manage Web Site–>Start to start serving up a default website, if it is not started already. You can test that your machine is now a web server by opening a browser window and entering “http://localhost” into the URL box. You should see Microsoft’s default welcome splash screen (blue).
Installing MS Web Platform Installer 5.0 and PHP Components
- In the WaDE zip file there is a folder called MSInstall. Run the enclosed MS Web Platform Installer Downloader executable. This will install the MS Web Platform Installer software. When finished downloading, search for Web Platform Installer on the start menu window and open the program. This installer program can access and install many tools that are useful for web server administration, blog-hosting, etc.
- Click on the Products tab at the top of the window. Click on the Add buttons for MS .NET Framework 4.5.1, Microsoft Drivers 3.0 for PHP v5.3 for SQL Server in IIS, and PHP Manager for IIS. Search for PHP 5.3.19 and click its Add button. Click on Install.
- A window will appear that shows the selected programs and other programs that are also needed. Click on Install. When finished, click on Finished and Exit.
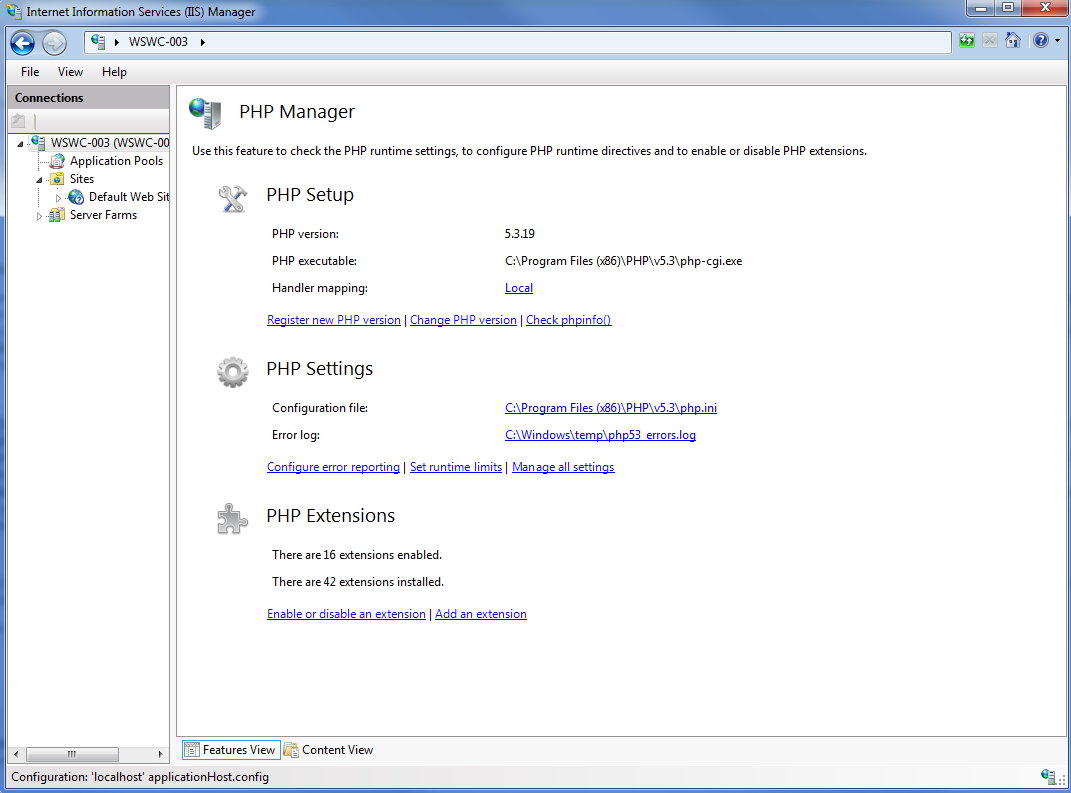
- Open IIS and click on the PHP Manager icon. Make sure your setup is pointing at your most recently installed PHP version 5.3.19. If not, click on Change PHP version to select the right one. (Note: this may conflict with other applications you may be running using PHP.)
- This is also the dialogue box where you can configure PHP settings most easily. For testing, click on Configure error reporting and select Development Machine. Change this to Production Machine after web services are fully tested. Click the back button to go back to the PHP Manager Main Page.
- Click on Enable or disable an extension. Select php_pdo_sqlsrv_53_nts_vc9.dll under the Disabled category and click on Enable in the Actions dialogue box in the top right of the window. Do the same for php_sqlsrv_53_nts_vc9.dll.
- Click on the back button to go to the IIS main page. Under the Actions dialogue box, click on Restart to restart the web server with the new configuration settings.
- Inside the ‘WaDE_v0.2_Web_Services‘ folder is another folder ‘WADE.‘ Copy the WADE folder into the location on the web server where you want the user to access your WaDE data. Inside the WaDE/v0.2 folder, there is a text file called config.inc.php. Open this with a text editor and replace $host variable with your local IP address for the WaDE database, replace $pass with the password you gave to the “wade_app1″ login, replace $dbname with the name you gave the restored WaDE database. Save and close.
- You will need to have OSX Server installed on your Mac. Open the Server application and navigate to the ‘Websites’ section of your server. If you haven’t already, toggle the website button on. This should enable the website functionality on your Mac. Check to see that the status button light is green.
- Under web applications, click to enable PHP applications. You can use an existing website, or create a new one based on your domains where you would like to have the WaDE web services accessible.
- Use Finder to go to the folders where your WaDE site will be hosted. Go back to the WaDE Postgres-FullApp GitHub Repository and download the WADE folder, or copy it from your local clone of the repo. Move these files to your site folder on the root. If you don’t want WaDE on your root folder, please contact Sara and she will help you modify the files for a different location.
- Check the permissions for the WADE folder to make sure your Mac’s web user can access and read the files, similar to your other webpages.
- Last step – Go to WADE/v0.2/config.inc.php and modify the credentials to match those you provided during the database setup for your wade_app login. Now use Safari to perform the testing below.
LOCAL TESTING
To test whether the connection to the database that you set up in the configuration file is working, enter “http://localhost/……../WADE/v0.2/GetCatalog/GetCatalog?loctype=HUC&loctxt=16020204&orgid=SAMPLE1&state=46″ into a web browser on the same machine in the URL address box. This will access the sample data if it is still in the tables of the database and return an XML file to your browser window. It should look like this:
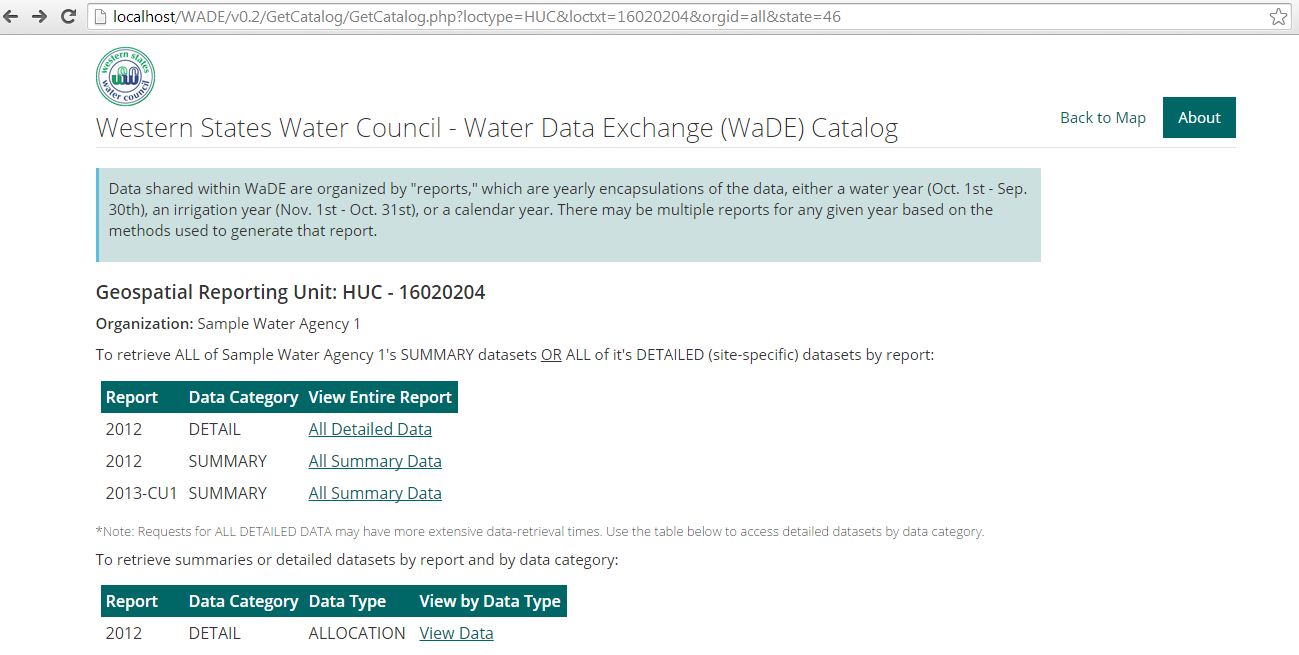 This data retrieval is a small set of sample data that is in the tables already to help you as you go through the data-mapping process. It is suggested that you use the sample data as a guide to entering in your own data, but that you overwrite it or delete it as you complete the tables. Once you do this, the test query above will no longer work, until you have your data inserted into the tables and use updated parameters.
STEP THREE out of FIVE – Entering Org, Reports, Reporting Units and Summaries——->>>